The Brownie Recipe Box

Chocolate Chunk Classic Brownies
This is the ultimate recipe for the quintessential brownie experience. Forget cakey imitations; these are the real deal—intensely rich with a glorious, crackly top and an unbelievably fudgy centre. A combination of brown and caster sugar creates a deep caramel flavour and a perfect texture, while generous chunks of dark chocolate melt into gooey pockets of delight in every single bite. Simple to make and impossible to resist, these are the classic, crowd-pleasing brownies.
Ingredients
150g plain (all-purpose) flour
65g cocoa powder
120g brown sugar
250g golden caster sugar
175g unsalted butter, melted and cooled
1 teaspoon vanilla extract
3 eggs
150g dark chocolate, chopped
20x20cm (8x8") tin for thick, deeply fudgy brownies or a 23x23cm (9x9") tin for slightly thinner, grab-and-go brownies.
Steps
Preheat your oven to 160°C (140°C Fan / Gas Mark 3). Lightly grease and line your chosen baking tin with non-stick baking paper.
In a large bowl, whisk the eggs with both sugars for around 2 minutes using a handheld or electric mixer, until thick, voluminous, and slightly paler.
In a separate bowl, combine the cocoa powder with the cooled melted butter, stirring until smooth and lump-free.
Pour the cocoa-butter mixture into the whisked eggs and sugar, along with the vanilla. Mix gently with a spoon or spatula until well combined.
Sift in the flour, folding it into the batter just until incorporated. Don’t over-mix—we want to keep the texture tender and fudgy.
Add the chopped chocolate and stir briefly to distribute.
Spread batter evenly in the prepared tin.
Bake according to your tin size:
For a 23x23cm (9x9") tin: Bake for 25–30 minutes.
For a 20x20cm (8x8") tin: Bake for 40–50 minutes. The brownies are ready when the top looks set and a toothpick inserted into the centre comes out with only a few moist crumbs attached.
Let the brownies cool in the tin for at least 5-10 minutes before lifting them out. You can either dive in while they're warm (for gooey squares) or leave them to cool completely (4–5 hours) for beautifully chewy, sliceable brownies.
Makes approx. 15 glorious, fudgy slices depending on the tin you choose.
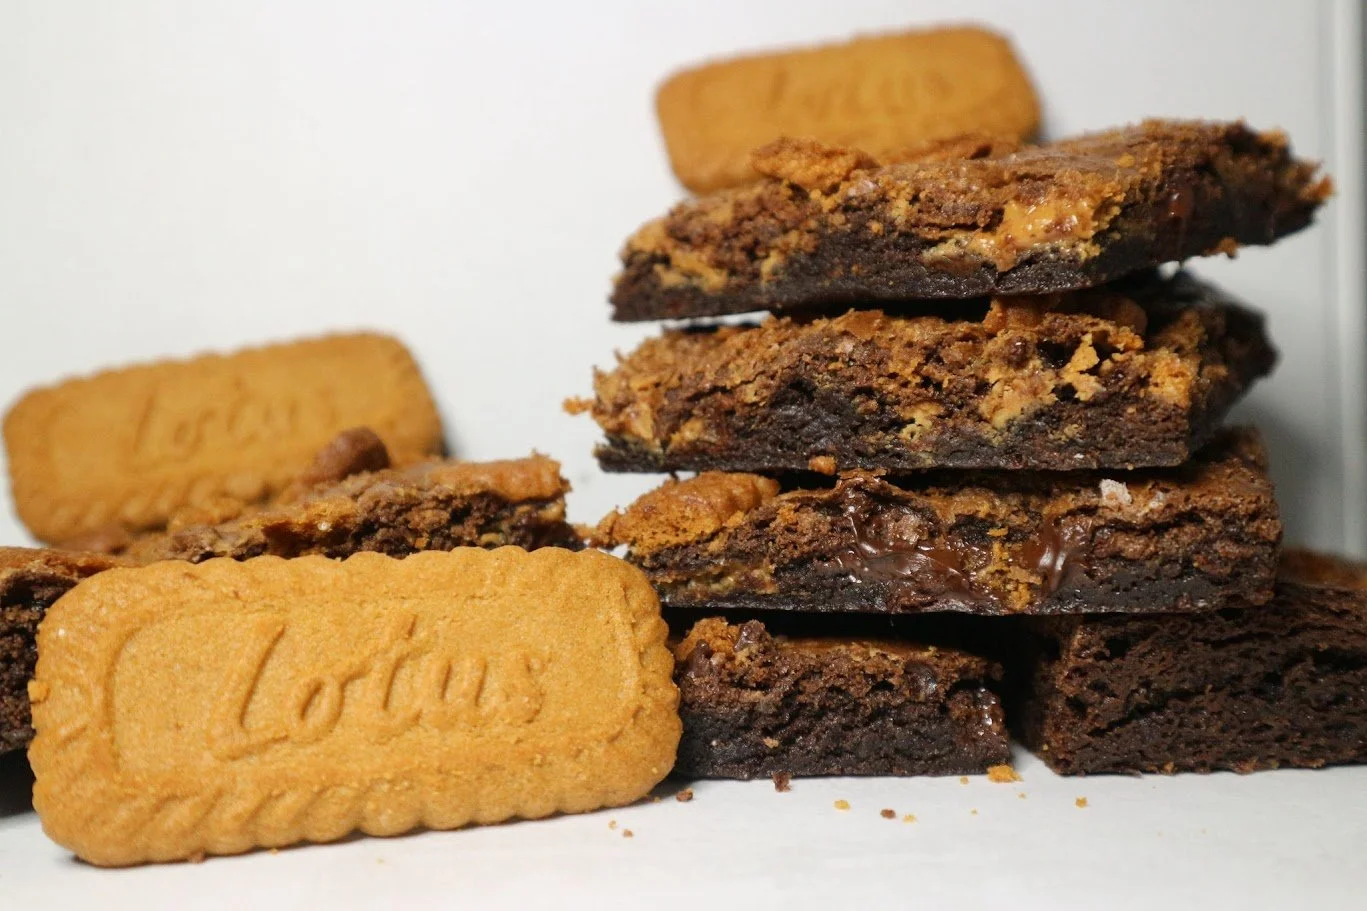
Biscoff Bliss Brownies
Prepare for the ultimate sweet indulgence where the classic, fudgy chocolate brownie meets the cult-favourite flavour of caramelised Biscoff. This recipe swirls rich, gooey Biscoff spread through a decadent chocolate batter, creating a marbled effect that’s as beautiful as it is delicious. Studded with chunks of dark chocolate and crunchy biscuit pieces, and topped with even more, every bite offers a symphony of textures—from the crisp, crackly top to the dense, fudgy centre and the satisfying crunch of spiced biscuit. It’s a guaranteed showstopper.
Ingredients
150g plain (all-purpose) flour
65g cocoa powder
120g brown sugar
250g golden caster sugar
175g unsalted butter, melted and cooled
1 teaspoon vanilla extract
3 eggs
100g dark chocolate, chopped
24g Biscoff biscuits, broken, plus extra for topping
3-4 tablespoons Biscoff spread
20x20cm (8x8") tin for thick, deeply fudgy brownies or a 23x23cm (9x9") tin for slightly thinner, grab-and-go brownies
Steps
Preheat your oven to 160°C (140°C Fan / Gas Mark 3). Lightly grease and line your chosen baking tin with non-stick baking paper.
In a large bowl, whisk the eggs with both sugars for around 2 minutes using a handheld or electric mixer, until thick, voluminous, and slightly paler.
In a separate bowl, combine the cocoa powder with the cooled melted butter, stirring until smooth and lump-free.
Pour the cocoa-butter mixture into the whisked eggs and sugar, along with the vanilla. Mix gently with a spoon or spatula until well combined.
Sift in the flour, folding it into the batter just until incorporated. Don’t over-mix.
Add the chopped chocolate and the 24g of broken Biscoff biscuits, stirring briefly to distribute.
Spread batter evenly in the prepared tin. Dollop the Biscoff spread over the surface, then use the end of a spoon or a dinner knife to gently swirl it through the mix for a marbled effect.
Sprinkle the remaining crushed or broken Biscoff biscuits for the topping.
Bake according to your tin size:
For a 23x23cm (9x9") tin: Bake for 25–30 minutes.
For a 20x20cm (8x8") tin: Bake for 40–50 minutes. The brownies are ready when the top looks set and a toothpick inserted into the centre (avoiding a swirl of spread) comes out with only a few moist crumbs attached.
Let the brownies cool in the tin for at least 5-10 minutes before lifting them out. You can either dive in while they're warm or leave them to cool completely (4–5 hours) for beautifully chewy, sliceable brownies.
Top Tip: Biscoff biscuits can crisp up a lot in the oven. For a softer topping, bake the brownies for half the total time, then remove from the oven, press the biscuits in gently, and return to the oven to finish baking.
Makes approx. 15 glorious, fudgy slices depending on the tin you choose.
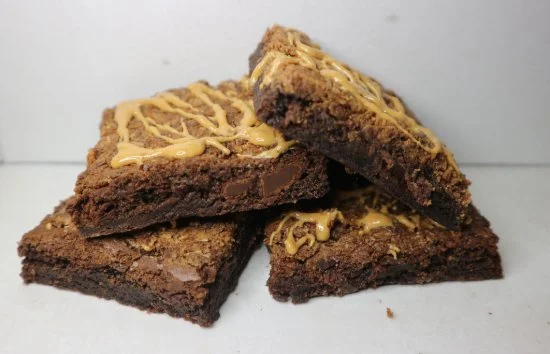
Peanut Butter Swirl Brownies
These are rich, salty-sweet and seriously satisfying. This recipe takes the perfect fudgy chocolate brownie and elevates it with luscious swirls of creamy or crunchy peanut butter. The salty, nutty notes of the peanut butter cut through the rich, dark chocolate, creating an irresistibly decadent flavour balance. With a beautiful marbled top and a dense, chewy texture, these brownies are a dream come true for any peanut butter lover.
Ingredients
150g plain (all-purpose) flour
65g cocoa powder
120g brown sugar
250g golden caster sugar
175g unsalted butter, melted and cooled
1 teaspoon vanilla extract
3 eggs
150g dark chocolate, chopped
5 tablespoons of your favourite peanut butter (smooth or crunchy both work!)
20x20cm (8x8") tin for thick, deeply fudgy brownies or a 23x23cm (9x9") tin for slightly thinner, grab-and-go brownies
Steps
Preheat your oven to 160°C (140°C Fan / Gas Mark 3). Lightly grease and line your chosen baking tin with non-stick baking paper.
In a large bowl, whisk the eggs with both sugars for around 2 minutes using a handheld or electric mixer, until thick, voluminous, and slightly paler.
In a separate bowl, combine the cocoa powder with the cooled melted butter, stirring until smooth and lump-free.
Pour the cocoa-butter mixture into the whisked eggs and sugar, along with the vanilla. Mix gently with a spoon or spatula until well combined.
Sift in the flour, folding it into the batter just until incorporated. Don’t over-mix.
Add the chopped chocolate and stir briefly to distribute.
Spread batter evenly in the prepared tin. Add the 5 tablespoons of peanut butter in dollops across the surface, then use the end of a spoon or a dinner knife to gently swirl it through the mix for a marbled effect.
Bake according to your tin size:
For a 23x23cm (9x9") tin: Bake for 25–30 minutes.
For a 20x20cm (8x8") tin: Bake for 40–50 minutes. The brownies are ready when the top looks set and a toothpick inserted into the centre (avoiding a peanut butter swirl) comes out with only a few moist crumbs attached.
Let the brownies cool in the tin for at least 5-10 minutes before lifting them out. You can either dive in while they're warm or leave them to cool completely (4–5 hours) for beautifully chewy, sliceable brownies.
Makes approx. 15 glorious, fudgy slices depending on the tin you choose.

Fudgy Mini Egg or Easter Brownies
Bring a touch of playful nostalgia and colourful crunch to your baking with these irresistible Mini Egg brownies. This recipe takes a classic, intensely fudgy chocolate brownie and loads it with the iconic candy-shelled eggs. Half are mixed into the rich batter, creating pockets of creamy milk chocolate, while the rest are scattered on top for a beautiful, speckled finish and a satisfyingly crisp bite. It's the perfect marriage of a soft, chewy brownie and a crunchy, sweet confection.
Ingredients
150g plain (all-purpose) flour
65g cocoa powder
120g brown sugar
250g golden caster sugar
175g unsalted butter, melted and cooled
1 teaspoon vanilla extract
3 eggs
150g dark chocolate, chopped
80g Mini Eggs (or more, if you're feeling generous!)
20x20cm (8x8") tin for thick, deeply fudgy brownies or a 23x23cm (9x9") tin for slightly thinner, grab-and-go brownies.
Steps
Preheat your oven to 160°C (140°C Fan / Gas Mark 3). Lightly grease and line your chosen baking tin with non-stick baking paper.
In a large bowl, whisk the eggs with both sugars for around 2 minutes using a handheld or electric mixer, until thick, voluminous, and slightly paler.
In a separate bowl, combine the cocoa powder with the cooled melted butter, stirring until smooth and lump-free.
Pour the cocoa-butter mixture into the whisked eggs and sugar, along with the vanilla. Mix gently with a spoon or spatula until well combined.
Sift in the flour, folding it into the batter just until incorporated. Don’t over-mix.
Gently stir in the chopped dark chocolate and about half the Mini Eggs. You can chop them roughly, finely, or leave some whole for a bit of drama.
Spread batter evenly in the prepared tin. Scatter the remaining Mini Eggs over the top, lightly pressing them into the batter so they are partially submerged.
Bake according to your tin size:
For a 23x23cm (9x9") tin: Bake for 25–30 minutes.
For a 20x20cm (8x8") tin: Bake for 40–50 minutes. The brownies are ready when the top looks set and a toothpick inserted into the centre comes out with only a few moist crumbs attached.
Let the brownies cool in the tin for at least 5-10 minutes before lifting them out. You can either dive in while they're warm or leave them to cool completely (4–5 hours) for beautifully chewy, sliceable brownies.
Makes approx. 15 glorious, fudgy slices depending on the tin you choose.
Gooey Salted Caramel Brownies
This is pure, unadulterated decadence. A classic, intensely rich chocolate brownie hides a secret, molten river of gooey, buttery caramel in its centre. Each bite is a journey through a crackly top and fudgy brownie before reaching the luscious, sweet caramel core, all perfectly balanced with a sharp, flaky sea salt kick. This is an incredibly luxurious and impressive treat that promises an unforgettable, messy, and utterly glorious eating experience.
Ingredients
150g plain (all-purpose) flour
65g cocoa powder
120g brown sugar
250g golden caster sugar
175g unsalted butter, melted and cooled
1 teaspoon vanilla extract
3 eggs
150g dark chocolate, chopped
150g (about 5-6 tbsp) Nestle Carnation Caramel
½ teaspoon flaky sea salt, divided
20x20cm (8x8") tin for thick, deeply fudgy brownies or a 23x23cm (9x9") tin for slightly thinner, grab-and-go brownies
Steps
Preheat your oven to 160°C (140°C Fan / Gas Mark 3). Lightly grease and line your chosen baking tin with non-stick baking paper.
In a large bowl, whisk the eggs with both sugars for around 2 minutes using a handheld or electric mixer, until thick, voluminous, and slightly paler.
In a separate bowl, combine the cocoa powder with the cooled melted butter, stirring until smooth and lump-free.
Pour the cocoa-butter mixture into the whisked eggs and sugar, along with the vanilla. Mix gently with a spoon or spatula until well combined.
Sift in the flour, folding it into the batter just until incorporated. Don’t over-mix.
Gently stir in the chopped dark chocolate.
Assemble the layers:
Pour half the brownie batter into the prepared tin and spread it evenly to the edges.
In a small bowl, mix the Carnation Caramel with half of your flaky sea salt (¼ tsp).
Dollop the salted caramel mixture over the batter in the tin, leaving a small 1cm border around the edge to prevent it from leaking out and burning.
Gently spoon the remaining brownie batter over the caramel layer, carefully spreading it to cover the caramel and seal the edges.
Sprinkle the remaining half of the flaky sea salt (¼ tsp) over the top of the batter.
Bake according to your tin size. The caramel layer may slightly increase the baking time, so be sure to test for doneness.
For a 23x23cm (9x9") tin: Bake for 25–35 minutes.
For a 20x20cm (8x8") tin: Bake for 40–55 minutes. The brownies are ready when the top looks set and a toothpick inserted into the centre comes out with moist crumbs attached (it may have caramel on it, so aim for a spot that looks like pure brownie).
Let the brownies cool in the tin for at least 20-30 minutes before lifting them out. The caramel centre will be very molten, so they need more time to set than a standard brownie. For cleaner slices, let them cool completely.
Makes approx. 15 glorious, fudgy slices depending on the tin you choose.
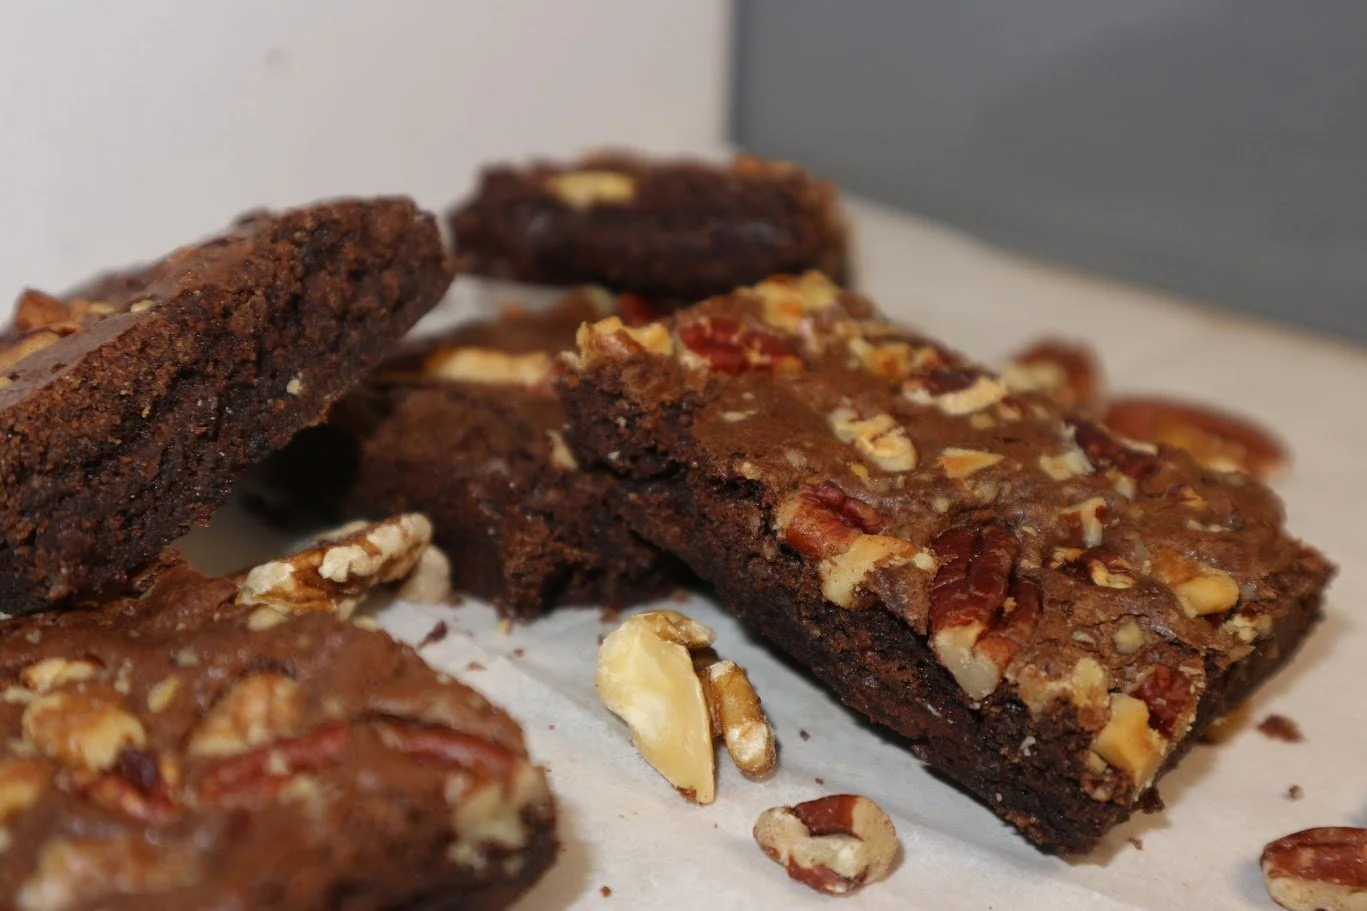
Pecan & Walnut Crunch Brownies
For those who love a bit of texture with their chocolate, this classic nut brownie is pure perfection. The deep, fudgy richness of the dark chocolate brownie is beautifully balanced by the earthy, buttery crunch of toasted pecans and walnuts. The nuts add a gorgeous, sophisticated flavour and a satisfying bite that cuts through the sweetness. This is a timeless, elegant bake that feels both comforting and wonderfully indulgent.
Ingredients
150g plain (all-purpose) flour
65g cocoa powder
120g brown sugar
250g golden caster sugar
175g unsalted butter, melted and cooled
1 teaspoon vanilla extract
3 eggs
150g dark chocolate, chopped
20g pecans, chopped
20g walnuts, chopped
Feel free to add more nuts if you wish!
20x20cm (8x8") tin for thick, deeply fudgy brownies or a 23x23cm (9x9") tin for slightly thinner, grab-and-go brownies.
Steps
Preheat your oven to 160°C (140°C Fan / Gas Mark 3). Lightly grease and line your chosen baking tin with non-stick baking paper.
In a large bowl, whisk the eggs with both sugars for around 2 minutes using a handheld or electric mixer, until thick, voluminous, and slightly paler.
In a separate bowl, combine the cocoa powder with the cooled melted butter, stirring until smooth and lump-free.
Pour the cocoa-butter mixture into the whisked eggs and sugar, along with the vanilla. Mix gently with a spoon or spatula until well combined.
Sift in the flour, folding it into the batter just until incorporated. Don’t over-mix.
Gently stir in the chopped dark chocolate and about half your chopped nuts.
Spread batter evenly in the prepared tin. Scatter the remaining chopped pecans and walnuts generously over the top, lightly pressing them into the batter.
Bake according to your tin size:
For a 23x23cm (9x9") tin: Bake for 25–30 minutes.
For a 20x20cm (8x8") tin: Bake for 40–50 minutes. The brownies are ready when the top looks set and a toothpick inserted into the centre comes out with only a few moist crumbs attached.
Let the brownies cool in the tin for at least 5-10 minutes before lifting them out. You can either dive in while they're warm or leave them to cool completely (4–5 hours) for beautifully chewy, sliceable brownies.
Makes approx. 15 glorious, fudgy slices depending on the tin you choose.
Fudgy Honey-Sweetened Brownies
This recipe is adapted to use honey instead of sugar, resulting in an intensely fudgy, slightly stickier, and beautifully flavoured brownie.
Ingredients
150g plain (all-purpose) flour
¼ teaspoon bicarbonate of soda
65g cocoa powder
195ml (approx. 278g) runny honey (a mild one like acacia or orange blossom works well)
175g unsalted butter, melted and cooled
1 teaspoon vanilla extract
3 eggs
150g dark chocolate, chopped
20x20cm (8x8") tin for thick, deeply fudgy brownies or a 23x23cm (9x9") tin for slightly thinner, chewier brownies.
Steps
Preheat your oven to 145°C (125°C Fan / Gas Mark 1). Lightly grease and line your chosen baking tin with non-stick baking paper.
In a separate bowl, combine the cocoa powder with the cooled melted butter, stirring until smooth and lump-free.
In a large bowl, whisk the eggs with the vanilla extract for about a minute until they are frothy and just combined. You will not be whipping them until thick and pale as you would with sugar.
Gently pour the honey into the whisked eggs, followed by the cocoa-butter mixture. Mix gently with a spatula until everything is just incorporated. The mixture will be quite liquid.
Sift in flour and bicarbonate of soda. Fold it into the batter just until you no longer see streaks of flour. Do not over-mix.
Add the chopped chocolate and stir briefly to distribute.
Spread batter evenly in the prepared tin.
Bake according to your tin size:
For a 23x23cm (9x9") tin: Bake for 30–40 minutes.
For a 20x20cm (8x8") tin: Bake for 45–55 minutes. Start checking at the minimum time. A toothpick inserted into the centre should come out with moist, sticky crumbs attached (not wet batter). The top should look dry and set.
Let the brownies cool in the tin for at least 20-30 minutes before attempting to lift them out. For the best chewy, sliceable texture, it is highly recommended to let them cool completely (4–5 hours or even overnight in the fridge).
Rich Chocolate & Fresh Raspberry Brownies
This is a truly elegant brownie for a summer's day. The intense, deep flavour of the dark chocolate brownie is cut through by sharp, vibrant bursts of fresh raspberry. The jewel-like berries are pressed into the rich batter, creating beautiful pockets of tart, fruity jamminess as they bake. It’s a sophisticated treat where the sweetness of the chocolate and the sharpness of the fruit meet in perfect, fudgy harmony.
Ingredients
150g plain (all-purpose) flour
65g cocoa powder
120g brown sugar
250g golden caster sugar
175g unsalted butter, melted and cooled
1 teaspoon vanilla extract
3 eggs
150g dark chocolate, chopped
150g fresh raspberries
20x20cm (8x8") tin for thick, deeply fudgy brownies or a 23x23cm (9x9") tin for slightly thinner, grab-and-go brownies
Steps
Preheat your oven to 160°C (140°C Fan / Gas Mark 3). Lightly grease and line your chosen baking tin with non-stick baking paper.
In a large bowl, whisk the eggs with both sugars for around 2 minutes using a handheld or electric mixer, until thick, voluminous, and slightly paler.
In a separate bowl, combine the cocoa powder with the cooled melted butter, stirring until smooth and lump-free.
Pour the cocoa-butter mixture into the whisked eggs and sugar, along with the vanilla. Mix gently with a spoon or spatula until well combined.
Sift in the flour, folding it into the batter just until incorporated. Don’t over-mix.
Gently stir in the chopped dark chocolate.
Assemble the layers:
Pour half the brownie batter into the prepared tin and spread it evenly.
Scatter about two-thirds of fresh raspberries over batter.
Carefully spoon the remaining brownie batter over the top, gently spreading to cover the fruit.
Press the remaining raspberries gently into the top surface of the batter.
Bake according to your tin size. Moisture from fresh raspberries will likely increase the baking time.
For a 23x23cm (9x9") tin: Bake for 30–40 minutes.
For a 20x20cm (8x8") tin: Bake for 45–55 minutes. The brownies are ready when the top looks set and a toothpick inserted into a chocolatey part of the brownie (avoiding a raspberry) comes out with only a few moist crumbs attached.
Let the brownies cool in the tin for at least 15-20 minutes before lifting them out. The fruit pockets will be very hot and jammy. For the cleanest slices, let them cool completely.
Makes approx. 15 glorious, fudgy slices depending on the tin you choose.
Sophisticated Brown Butter Chocolate Brownies
This recipe takes the quintessential brownie experience to a whole new level of sophistication. By browning the butter until its milk solids are toasted, we unlock a wonderful nutty, toasty, and slightly caramelised flavour that infuses the entire bake. This "beurre noisette" deepens the chocolate notes and adds an incredible aroma, creating a brownie that is richer, more complex, and utterly irresistible. It’s the secret ingredient that makes a great brownie memorable.
Ingredients
210g unsalted butter (this higher amount is to account for water evaporation)
150g plain (all-purpose) flour
65g cocoa powder
120g brown sugar
250g golden caster sugar
1 teaspoon vanilla extract
3 eggs
150g dark chocolate, chopped
2 tablespoons water or milk, at room temperature
20x20cm (8x8") tin for thick, deeply fudgy brownies or a 23x23cm (9x9") tin for slightly thinner, grab-and-go brownies.
Steps
Make the Brown Butter:
Place the 210g of unsalted butter in a light-coloured saucepan over a medium heat.
Allow the butter to melt completely, then continue to cook as it foams and bubbles. Swirl the pan occasionally.
After a few minutes, the foam will subside, and you will see golden-brown specks (toasted milk solids) forming at the bottom. The butter will have a distinct, nutty aroma.
Immediately remove the pan from the heat and pour the brown butter, including all the brown specks, into a large, heatproof bowl to stop the cooking process. Cool for 15-20 minutes.
Once the brown butter has cooled, stir in the 2 tablespoons of water or milk and the vanilla extract.
Preheat your oven to 160°C (140°C Fan / Gas Mark 3). Lightly grease and line your chosen baking tin with non-stick baking paper.
In a large bowl, whisk the eggs with both sugars for around 2 minutes using a handheld or electric mixer, until thick, voluminous, and slightly paler.
In the bowl with the cooled brown butter, whisk in the cocoa powder until smooth and lump-free.
Pour the brown butter-cocoa mixture into the whisked eggs and sugar. Mix gently with a spoon or spatula until well combined.
Sift in the flour, folding it into the batter just until incorporated. Don’t over-mix.
Add the chopped chocolate and stir briefly to distribute.
Spread batter evenly in the prepared tin.
Bake according to your tin size:
For a 23x23cm (9x9") tin: Bake for 25–30 minutes.
For a 20x20cm (8x8") tin: Bake for 40–50 minutes. The brownies are ready when the top looks set and a toothpick inserted into the centre comes out with only a few moist crumbs attached.
Let the brownies cool in the tin for at least 5-10 minutes before lifting them out. You can either dive in while they're warm or leave them to cool completely (4–5 hours) for beautifully chewy, sliceable brownies.
Makes approx. 15 glorious, fudgy slices depending on the tin you choose
Ultimate Oreo Stuffed Cookie Dough Brownies
This is the pinnacle of sweet indulgence, a three-tiered marvel that combines three of the world's favourite treats into one glorious bar. It begins with a soft, chewy chocolate chip cookie dough base, which is topped with a complete layer of classic Oreo biscuits for a delightful crunch. The entire creation is then crowned with a rich, intensely fudgy brownie batter. When baked, it becomes a multi-layered masterpiece of textures and flavours that is guaranteed to be the talk of any gathering.
Ingredients
For the Cookie Dough Base:
130g plain (all-purpose) flour
½ teaspoon baking soda (bicarbonate of soda)
A pinch of salt
115g unsalted butter, softened
75g soft light brown sugar
50g golden caster sugar
1 large egg
1 teaspoon vanilla extract
100g chocolate chips (milk or dark)
For the Oreo Layer:
1-2 packets of Oreo biscuits (approx. 16-25 biscuits, enough for a single layer)
For the Brownie Topping:
150g plain (all-purpose) flour
65g cocoa powder
120g brown sugar
250g golden caster sugar
175g unsalted butter, melted and cooled
1 teaspoon vanilla extract
3 eggs
150g dark chocolate, chopped
Steps
Preheat your oven to 160°C (140°C Fan / Gas Mark 3). For this recipe, a 20x20cm (8x8") tin is highly recommended. Grease it and line it well with non-stick baking paper, leaving some overhang to help you lift it out later.
Make the Cookie Dough Base:
In a medium bowl, whisk together the 130g of flour, baking soda, and salt.
In a separate large bowl, beat the 115g of softened butter with the brown and caster sugars until light and fluffy. Beat in the egg and vanilla extract.
Gradually add the dry ingredients to the wet ingredients, mixing until just combined. Stir in 100g chocolate chips.
Press the cookie dough evenly into the base of your prepared tin.
Add the Oreo Layer:
Arrange the Oreo biscuits in a single, even layer on top of the cookie dough, covering it completely.
Make the Brownie Topping:
In a large bowl, whisk the 3 eggs with 120g of brown sugar and 250g of caster sugar for about 2 minutes, until thick and paler.
In a separate bowl, combine the 65g of cocoa powder with the 175g of cooled, melted butter, stirring until smooth.
Pour the cocoa-butter mixture into the whisked eggs, along with the vanilla. Mix gently until just combined.
Sift in the 150g flour, folding it into the batter until just incorporated. Stir in 150g chopped dark chocolate.
Assemble and Bake:
Carefully pour the finished brownie batter over the Oreo layer, spreading it gently and evenly to cover all the biscuits and reach the edges of the tin.
Bake in a preheated oven for 45-55 minutes. This is a very deep bake, so it needs a longer time.
The brownies are ready when the brownie topping is set and a toothpick inserted into the top brownie layer comes out with moist crumbs, but not wet batter.
Cooling (Crucial Step!):
You must let these brownies cool completely in the tin. This will take at least 4-5 hours, or you can pop them in the fridge once they're mostly cool. If you try to slice them while warm, they will fall apart. Patience is key!
Once fully cooled and firm, use the baking paper overhang to lift the entire bake out of the tin and slice it into squares.
Intense Espresso Chocolate Brownies (Two Ways)
This one is for the true coffee connoisseur. A profoundly rich and fudgy chocolate brownie is infused with a bold shot of espresso, creating the ultimate mocha experience. The robust, aromatic coffee notes don't just add flavour; they amplify and deepen the complexity of the dark chocolate, cutting through the sweetness for a sophisticated, less-sweet, and intensely satisfying treat. With a crackly top and a dense, chewy centre, this is pure mocha perfection.
Ingredients
150g plain (all-purpose) flour
65g cocoa powder
120g brown sugar
250g golden caster sugar
175g unsalted butter, melted and cooled
1 teaspoon vanilla extract
150g dark chocolate, chopped
For the Coffee Flavour & Eggs (Choose ONE option):
OPTION 1 (Intense & Simple):
3 large eggs
2-3 tablespoons instant espresso powder
OPTION 2 (Fresh & Aromatic):
2 large eggs (Note: one less egg is used)
1 strong double espresso (approx. 60ml), freshly brewed and cooled slightly
Steps
Preheat your oven to 160°C (140°C Fan / Gas Mark 3). Lightly grease and line a 20x20cm (8x8") or 23x23cm (9x9") baking tin with non-stick baking paper.
In a large bowl, whisk either 3 or 2 eggs (depending on your chosen coffee option) with both sugars for around 2 minutes using an electric mixer, until thick, voluminous, and slightly paler.
In a separate bowl, combine the cocoa powder and cooled melted butter.
If using Option 1 (powder): Add the instant espresso powder to this mixture and stir until it is completely dissolved and the mixture is smooth.
Pour the cocoa-butter mixture into the whisked eggs and sugar, along with the vanilla.
If using Option 2 (fresh espresso): Pour the cooled 60ml double espresso in at this stage as well.
Mix gently with a spoon or spatula until combined.
Sift the flour, folding it into the batter until just incorporated. Don’t over-mix.
Add the chopped dark chocolate and stir briefly to distribute.
Spread batter evenly in the prepared tin.
Bake according to your tin size:
For a 23x23cm (9x9") tin: Bake for 25–30 minutes.
For a 20x20cm (8x8") tin: Bake for 40–50 minutes. The brownies are ready when the top looks set and a toothpick inserted into the centre comes out with only a few moist crumbs attached.
Let the brownies cool in the tin for at least 5-10 minutes before lifting them out. For beautifully chewy, sliceable brownies, cool completely.
Fudgy Vegan Chocolate Brownies
This is the ultimate recipe for the quintessential vegan brownie experience. Forget compromises; these are the real deal—intensely rich with a glorious, crackly top and an unbelievably fudgy centre. A clever combination of aquafaba and sugar creates a perfect chewy texture, while generous chunks of dairy-free dark chocolate melt into gooey pockets of delight. Simple to make and impossible to resist, these are classic, crowd-pleasing brownies, reimagined.
Ingredients
150g plain (all-purpose) flour
65g Dutch-process cocoa powder
120g brown sugar
250g golden caster sugar
175g good quality vegan butter block, melted and cooled
1 teaspoon vanilla extract
9 tablespoons (approx. 135ml) aquafaba (the liquid from a can of chickpeas)
150g dairy-free dark chocolate, chopped
20x20cm (8x8") tin for thick, deeply fudgy brownies or a 23x23cm (9x9") tin for slightly thinner, grab-and-go brownies.
Steps
Preheat your oven to 160°C (140°C Fan / Gas Mark 3). Lightly grease and line your chosen baking tin with non-stick baking paper.
In a large bowl, whisk the aquafaba with both sugars for around 3-4 minutes using a handheld or electric mixer. The mixture should become very frothy, thick, glossy, and slightly paler.
In a separate bowl, combine the Dutch-process cocoa powder with the cooled, melted vegan butter, stirring until smooth and lump-free.
Pour the cocoa-butter mixture into the whisked aquafaba and sugar, along with the vanilla. Mix gently with a spoon or spatula until well combined.
Sift in the flour, folding it into the batter just until incorporated.
Don’t over-mix—this is key to keeping the texture tender and fudgy.Add the chopped dairy-free dark chocolate and stir briefly to distribute.
Spread batter evenly in the prepared tin.
Bake according to your tin size:
For a 23x23cm (9x9") tin: Bake for 25–30 minutes.
For a 20x20cm (8x8") tin: Bake for 40–50 minutes.
The brownies are ready when the top looks set and a toothpick inserted into the centre comes out with only a few moist crumbs attached.Let the brownies cool in the tin for at least 15-20 minutes before lifting them out. They must cool completely (4–5 hours) for the fudgy texture to set properly and to achieve beautifully chewy, sliceable brownies.
Makes approx. 15 glorious, fudgy slices depending on the tin you choose.