Burning Brownie Questions Answered (FAQ)!

Disclosure: This post contains affiliate links. If you click on these links and make a purchase, we may earn a commission. This commission helps us to keep the site running and provides you with more helpful content. However, this does not influence our reviews, which are always honest and unbiased. We only recommend products or services that we believe will be of value to you.
FAQ - Questions and Answers
Right then, my lovely brownie bakers! Let's pull up a chair, pop the kettle on, and have a natter about those burning brownie questions. You know, the ones that niggle at you when you're dreaming of that perfect, chocolatey square. I've gathered all your brilliant queries, from swapping bits and bobs in the batter to mastering those tricky techniques and keeping your bakes perfectly fresh. We've also included handy links for online ordering to make things a bit easier for you, though we still prefer to purchase items locally where possible.
Let's dive in and get you well on your way to brownie bliss!
Ingredient Swaps & Twists – The Heart of the Batter
Question: Oh, the classic butter versus oil debate! Can I swap them about in my brownies recipes? What happens to the taste and that all-important texture? And is there a magic number for converting them?
Answer: Ah, yes, the great fat conundrum! You absolutely can play around with butter and oil, but like swapping your favourite dancing shoes for comfy slippers, you'll notice a difference!
Oil in place of Butter: Think of oil as the secret to a wonderfully fudgy, almost gooey brownie. Because oil is pure fat (butter has a bit of water and milk solids, you see), it tends to make brownies incredibly moist and often a bit chewier – rather like those nostalgic boxed mixes many of us grew up with! You might find the flavour a tad simpler, as butter does bring a certain richness to the party.
Melted Butter instead of Oil: Now, if you're using a recipe that calls for oil (especially those boxed ones) and you fancy a richer, more buttery hug, swapping in melted butter (cup for cup usually does the trick) will give your brownies a lovely depth and an even fudgier heart.
The Nitty-Gritty on Converting: If you're working from a recipe that asks for solid butter and you want to use oil, remember butter isn't all fat (it's about 80-82%). So, you might want to use a smidgen less oil. A good rule of thumb is about 3/4 to 7/8 of a cup of oil for every 1 cup of butter. If you're going the other way, you might need a tiny bit more butter. Honestly, though, for most brownie recipes that call for melted butter anyway, a straight swap by volume (cup for cup) works a treat, just know that lovely texture will shift a bit. Melted butter, you see, is the golden ticket to truly fudgy brownies!
Question: My recipe's calling for unsalted butter, but all I've got is salted. How do I tweak the salt so it's just right?
Answer: No worries at all, salted butter is perfectly fine to use! It’s like adding a little pinch of seasoning as you go. Generally, salted butter has about 1/4 of a teaspoon of salt for every 1/2 cup (that's 4 ounces) of butter. So, if your recipe wants 1/2 a cup of unsalted butter and 1/4 teaspoon of extra salt, and you're using your 1/2 cup of salted butter, you can usually just leave out that extra 1/4 teaspoon of salt. Easy peasy!
Question: I'm all out of espresso powder! What else can I use to give my chocolate flavour a bit of oomph, and how much should I pop in?
Answer: Espresso powder is a little bit of magic for making chocolate taste even more chocolatey, isn't it? But if the jar's empty, don't fret!
Instant Coffee Powder or Granules: A straight swap usually works a charm – use the same amount of instant coffee as you would espresso powder. Espresso powder is a bit more intense, so the boost might be a touch gentler, but still lovely. Just don't go too wild, or you might get a hint of bitterness.
Strong Brewed Coffee (chilled, mind you): You can replace a tiny bit of the liquid in your recipe (like water or milk) with the same amount of strong, cold coffee.
Unsweetened or Dutch-Process Cocoa Powder: In a real pinch, an extra teaspoon or two of cocoa powder will deepen that chocolatey goodness. It might give a slightly fruitier note than espresso, but still delicious. Best to steer clear of sweetened cocoa or hot chocolate mix, as they'll change the sugar balance and the overall taste.
Finely Ground Espresso Beans: If you have whole beans, you can grind them super finely. Use a bit less than you would of espresso powder, as freshly ground beans can be quite punchy and a bit coarser.

Question: Can I cut down on the sugar in my brownie recipe? I'm curious how it'll change the texture, moisture, and that gorgeous crinkly top everyone loves.
Answer: Ah, the sugar question! It's a tempting thought, but sugar does more than just make things sweet in a brownie; it's a bit of a structural marvel.
Texture: If you reduce the sugar significantly, your brownies are likely to be a bit drier, more crumbly, and not quite as tender. Sugar is key to that soft, squidgy crumb we adore.
Moisture: Sugar is what we call a humectant – it loves to grab onto moisture and hold it tight. Less sugar means less moisture, and that means a drier brownie.
That Crackly Top: That beautiful, shiny, crackly crust? It's largely thanks to the sugar dissolving just so. Cut back too much, and you'll likely wave goodbye to that lovely shatter.
Flavour: Naturally, they'll be less sweet, and if you're using dark chocolate, they might even taste a little more bitter.
If you do fancy experimenting with a small reduction, make sure the sugar you do use is really well dissolved (some folks gently warm it with the eggs). And be warned, lower-sugar brownies can bake faster and are more prone to drying out. If you just want them to taste less sweet, sometimes a tiny bit more salt or using a more bittersweet chocolate can do the trick without changing the whole structure.
Question: How can I whip up a batch of gluten-free brownies? What are the best gluten-free flour blends, and do I really need that xanthan gum stuff?
Answer: Making glorious gluten-free brownies is absolutely doable, and oh-so-rewarding!
Gluten-Free Flour Blends: The simplest path to gluten-free brownie joy is a good quality 1-to-1 (or measure-for-measure) gluten-free baking flour blend. These are cleverly designed to pop straight into your recipe in place of regular plain flour.
Xanthan Gum – The Magic Binder: This little ingredient is rather important in gluten-free baking. It helps give your brownies structure and stops them from crumbling, doing the job that gluten normally would. Most 1-to-1 blends already have it mixed in. If yours doesn't, you'll likely need to add a bit – usually about 1/4 to 1/2 a teaspoon per cup of gluten-free flour for brownies, but always check what the flour packet suggests.
Other Gluten-Free Stars: For incredibly fudgy gluten-free brownies, some recipes have brilliant success using starches like tapioca flour (also called tapioca starch) or cornflour as the main "flour." These are super fine and make for a smooth, rich, and very fudgy texture without any grittiness.
Question: I'm dreaming of vegan brownies! What are the top-notch substitutes for eggs and dairy?
Answer: Vegan brownies can be absolutely divine! There are some fantastic plant-based heroes to step in for eggs and dairy:
Egg Swaps (this is for one large egg):
Unsweetened Apple Sauce: Use 1/4 cup (about 2 and a bit fluid ounces if you're measuring that way, or roughly 60-65g by weight if you prefer). It adds lovely moisture and is a real favourite for brownies.
Mashed Ripe Banana: About 1/4 cup (same as above) – that's roughly half a small banana. It can bring a gentle banana whisper to the flavour.
Pumpkin Purée: Again, 1/4 cup. Works a treat in chocolatey bakes, keeping them nice and moist.
Aquafaba (the water from a tin of chickpeas): Use 3 tablespoons for a whole egg, or 2 tablespoons for an egg white (especially good if you're chasing that crinkly top)
Ground Flaxseed or Chia Seeds: Mix 1 tablespoon of ground flaxseed or chia seeds with 2.5 to 3 tablespoons of water. Let it sit for 5-10 minutes until it turns into a bit of a gel.
Dairy-Free Yoghurt (unsweetened): 1/4 cup. Adds richness and moisture.
Nut Butter (Almond, Cashew, or Sunflower Seed for a nut-free option): 1/4 cup. Wonderful for really rich, fudgy results.
Dairy Swaps:
For Butter: A good quality vegan butter block is your best friend here. Melted coconut oil can also work, though it might lend a subtle coconut note.
For Milk: Any unsweetened dairy-free milk will do beautifully – almond, soya, oat, or cashew milk, swapped cup for cup.
A Little Cocoa Tip for Vegan Bakes: Using Dutch-process cocoa powder is often a good shout for vegan brownies. It's less acidic and can help create an even fudgier texture when you're not using traditional dairy and eggs.
Question: What's the story with brown sugar versus white sugar in brownies? How do they change the flavour and that all-important crust?
Answer: Ah, the sugar twins! They each bring their own personality to the brownie pan, especially when it comes to flavour and that lovely top.
White (Granulated) Sugar: This chap tends to give you brownies that are a bit sweeter, with a thinner, drier, and more distinctly crackled or wavy crust. The way those little sugar crystals behave on the surface is what creates that lovely shatter.
Brown Sugar: This one's got molasses in it, which means more moisture and a deeper, more caramelly or toffee-like flavour. Brownies made with more brown sugar are often denser and wonderfully chewy. However, that extra moisture can sometimes mean a softer, more solid top rather than a delicate crackly one.
The Best of Both Worlds: Many recipes cleverly use a mix of both white and brown sugar. This way, you get the rich flavour and chew from the brown sugar, and that desirable crust from the white sugar. A perfect partnership!

Question: Does it make a difference if I use melted butter or softened (creamed) butter? Which one's the champion for fudgy brownies, and which for cakey ones?
Answer: Oh, this is a big one! The state of your butter is a direct line to your brownie's texture.
Melted Butter – The Fudgy Friend: This is your go-to for dense, gloriously fudgy brownies. When you melt butter (often with sugar or chocolate), it coats the flour particles, which stops too much gluten from developing. It also doesn't trap as much air as creaming does. This lack of air is the secret to a dense, moist, and utterly fudgy result. Pure bliss!
Softened (Creamed) Butter – The Cakey Companion: This technique is what you want for lighter, more cake-like brownies. Creaming softened butter with sugar whips air into the batter. These tiny air bubbles expand when they get warm in the oven, giving your brownies lift and a lighter, more open, cakey crumb.
Question: Should my eggs be chilly from the fridge or happy at room temperature for brownies? And why does it even matter?
Answer: For the happiest brownie batter, it's always best to use room temperature eggs.
Why it Matters, My Dear: Popping cold eggs straight from the fridge into a batter with warm melted butter or chocolate can make those lovely fats seize up and go a bit solid. This can lead to a lumpy batter (nobody wants that!), stop everything from mixing together smoothly (which can mean greasy brownies), or even make your brownies a bit more cakey instead of fudgy, because the solidified butter acts more like creamed butter. Cold eggs also don't mix in as nicely or whip up as well if you're trying to get some air in there.
A Quick Warm-Up Trick: To get your eggs to room temperature in a jiffy, just pop them in a bowl of warm (not hot!) water for about 10-15 minutes before you need them.
Baking Brilliance & Pan Puzzles – Getting it Just Right
Question: What on earth does it mean to beat eggs and sugar to the 'ribbon stage' in a brownie or cake recipe? What am I looking for?
Answer: Ah, the "ribbon stage" – it sounds rather fancy, doesn't it? It's a technique where you whisk eggs (either whole ones or just the yolks) with sugar until the mixture becomes lovely and thick, turns a pale, creamy colour, and grows quite a bit in volume – often it can triple!
Spotting the Signs: The main clue is when you lift your beaters or whisk out of the mixture, the batter falls back onto itself in thick, continuous "ribbons." These ribbons should stay visible on the surface for a few moments before they gently melt back into the rest of the batter. The colour will have lightened to a very pale yellow. This process whips a good amount of air into your mixture, which is super important for the structure and lightness of some cakes, and it can also help create that beautiful, shiny, meringue-like crust on your brownies.
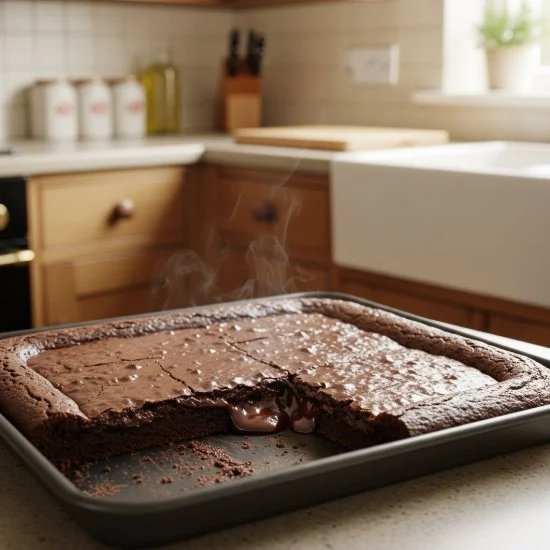
Question: Is baking paper (parchment) really a must for brownies? What are the perks?
Answer: Now, you can bake brownies without baking paper (parchment) if your tin is greased like a bobsleigh run, but honestly, using it is highly, highly recommended. It’s a bit of a baking superhero!
Easy Lifting: It lets you lift the whole glorious slab of brownies out of the tin once they've cooled (especially if you make a little "sling" with some paper overhanging the sides). This means they come out all in one piece, no heartbreaking crumbles.
No More Sticking: It creates a lovely non-stick surface, which is an absolute dream for those wonderfully fudgy, sticky brownies.
Neater Slices: Getting the brownies out of the tin before you cut them means you can get much tidier, cleaner slices. Presentation points!
Washing-Up Wonder: It makes cleaning the baking tin so much easier. Less scrubbing, more brownie-eating time!
Question: Help! My baking tin is a different size to the one in the recipe. How do I sort out the recipe and the baking time?
Answer: The dreaded tin-size tangle! It happens to the best of us. You'll need a bit of simple maths for the ingredients and a watchful eye for the baking time. Firstly though, you need to decide if you want “thick and gooey square” or “thinner grab-and-go” style, which I love.
Tweaking the Ingredients:
Baked in a classic 8 x 8 inch tins will give you 9 x thick and gooey squares
Baked in a 9 x 13 inch tins will give you 15 x thinner grab-and-go
Adjusting the Bake Time: This isn't an exact science, as it depends on how much the depth of the batter changes.
If your tin is bigger than the recipe's, your batter will be thinner and will likely bake faster.
If your tin is smaller, your batter will be thicker and will likely bake slower. Always start checking for doneness a bit earlier than the original recipe says if your batter is thinner, and expect it to take a bit longer if it's thicker. Trust your eyes and the trusty skewer test more than the clock!
Question: Can I bake my brownies in a fan oven? How should I change the temperature and time?
Answer: Yes, indeed! fan ovens are great for brownies with a few little adjustments.
Temperature Reduction: As a general rule, reduce the conventional oven temperature specified in the recipe by about 20°C (36°F).
For example, if the recipe calls for 160°C in a conventional oven, set your fan oven to 140°C.
Baking Time Reduction: Fan ovens circulate hot air, which typically results in faster baking. Start checking for doneness a few minutes earlier than the minimum time suggested in the recipe.
Tins and Turning: Light-coloured metal or aluminium tins work wonderfully with the even heat of a convection fan. Some bakers still like to give the tin a turn halfway through, just to be absolutely sure of even baking, but others find it's not really needed with all that circulating air.

Question: When's the perfect moment to add lovely extras like nuts, chocolate chips, or swirls to my brownie batter? Before they go in the oven, or after?
Answer: Good question! It all depends on what deliciousness you're adding:
Chunky Bits (like nuts, chocolate chips, or bits of sweets): These are usually best stirred into the batter just before you pour it into the tin. Or, you can sprinkle them over the top before baking. If you want your chocolate chips to stay more whole and less melty, let your batter (especially if it's warm from melted chocolate and butter) cool down for about 20 minutes before you stir in the chips.
Swirls (think jam, caramel, peanut butter, cream cheese, or marshmallow fluff): These are best added after you've poured the brownie batter into your prepared tin, but before it goes into the oven. Drop little dollops of your swirl ingredient onto the batter, then use a knife or a skewer to gently swirl it through. Just a little note: adding thick sauces or spreads might mean your brownies need a tiny bit longer in the oven.
Delicate Toppings (like flaky sea salt or some very fine sprinkles): Flaky sea salt is often best sprinkled on after the brownies are baked, either while they're still warm or once they've cooled. Some delicate sweets or marshmallows might be nice added in the last few minutes of baking so they melt just a little, or popped on as soon as the brownies come out of the oven.

Question: Oh dear! I've cut into my brownies, and they're still a bit raw in the middle! Can I pop them back in the oven?
Answer: Don't panic! Yes, you can often rescue them, but you need to be a bit gentle.
The Rescue Mission: Get your oven back on to the original baking temperature. If the brownies have cooled down a lot, let them come a bit closer to room temperature before they go back in, so they don't get a shock. Arrange the cut pieces on a baking tray (maybe with a little space between them if the very middle was the main problem, as this helps the heat get all around).
Bake them for very short bursts, starting with just 2-5 minutes, then check again with a skewer in the rawest-looking bit. The edges that are already cooked can catch and burn quickly while the middle is trying to cook through, so keep a very close eye on them. It's a bit of a balancing act to get the centre cooked without overdoing the rest. Fingers crossed!
Storing & Savouring Your Baked Treasures
Question: What's the best way to keep my homemade brownies fresh and lovely? How long do they usually last at room temperature, and what about in the fridge?
Answer: Keeping your brownies happy is key to enjoying every last crumb!
At Room Temperature: For most brownies (the ones without any fresh cream frostings or fillings that need to be kept chilled), an airtight container at room temperature is perfect. You can also wrap them up snugly in cling film or foil. Kept like this, they should stay lovely for about 3 to 5 days.
In the Fridge: Popping your brownies in an airtight container in the fridge can make them last a bit longer, maybe up to a week. However, the fridge can sometimes make plain brownies a little dry if they're not sealed up really well.
Brownies with Special Bits: If your brownies have things like cream cheese (in a swirl or frosting), fresh fruit, or a custard-type filling, they must be kept in an airtight container in the fridge and enjoyed within a few days.
Question: Can I freeze brownies? What's the secret to keeping them delicious for ages, and how do I defrost them properly?
Answer: Absolutely! Brownies freeze like a dream, which makes them a brilliant treat to have stashed away. They're usually at their best for up to 3 months in the freezer.
How to Freeze Them Like a Pro:
Cool, Cool, Cool: Make absolutely sure your brownies are completely cool – right down to room temperature – before you even think about wrapping them for the freezer.
Individual Squares: Cut your brownies into squares first. Wrap each square tightly in cling film, and then give it another layer of aluminium foil. Pop these little doubly-wrapped parcels into an airtight freezer bag or a freezer-safe container.
The Whole Slab: If you used a baking parchment sling, you can lift the whole cooled slab of brownies out. Wrap the slab very, very tightly in cling film, then a layer of foil. Then, slide the wrapped slab into a big airtight freezer bag or container. Another trick is to briefly freeze the unwrapped slab in its tin just until it's firm, then take the "block" out, wrap it as above, and pop it back in the freezer.
Bringing Them Back to Life (Defrosting):
Take out as many brownies (or the whole slab) as you need from the freezer.
Unwrap them – this stops any condensation from making them a bit soggy.
Let them thaw at room temperature on a plate or in an airtight container for a few hours.
Alternatively, you can gently microwave individual frozen brownies in 15-second bursts on a low power setting until they're thawed, but be careful not to overheat them and make them tough!
Question: My day-old brownies are a bit dry and sad. Is there any way to bring them back to life and make them soft again?
Answer: Don't you dare throw those slightly less-than-perfect brownies away! There are a few little tricks to perk them up:
The Microwave Magic: Pop a brownie piece on a bit of kitchen roll. You can either lightly dampen the kitchen roll or put another damp piece over the brownie. Microwave on a medium (or low-medium) setting for about 10-15 seconds. Check if it's softened, and if it needs a little more, give it another very short 5-second burst. Just be careful not to overdo it, or they can go tough.
The Bread Buddy Trick: Place a slice or two of fresh bread (plain white bread works well) into an airtight container along with your dry brownies. Seal the container and leave it overnight at room temperature. The brownies will magically soak up some moisture from the bread and become softer and much more tender. It’s like a little spa day for them!
A Quick Warm-Up in the Oven (for eating straight away): Preheat your oven to a low temperature, around 300°F (that's 150°C). Put the brownie pieces on a baking tray (maybe lined with parchment). Warm them for just 1-2 minutes. This can soften them up quickly, but they do tend to get firm again quite fast once they cool, so serve them up right away while they're lovely and warm.